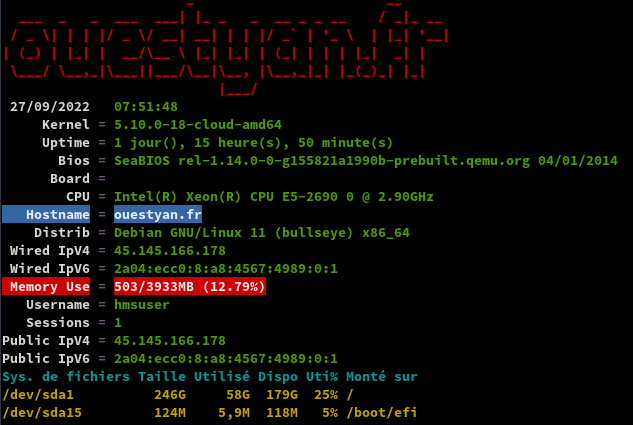
HostMyServers, server32771 Debian 11 (Bullseye)

Debian bullseye
![]()
PARAMETRES D’ACCES:
L’adresse IPv4 du VPS est : 45.145.166.178
L’adresse IPv6 du VPS est : 2a04:ecc0:8:a8:4567:4989::1
Connexion SSH en “root”
1
ssh root@45.145.166.178
Modifier le fichier des dépôts /etc/apt/sources.list
1
2
3
4
5
6
7
8
deb http://deb.debian.org/debian bullseye main contrib non-free
deb-src http://deb.debian.org/debian bullseye main contrib non-free

#deb http://deb.debian.org/debian bullseye-updates main contrib non-free
#deb-src http://deb.debian.org/debian bullseye-updates main contrib non-free

deb http://security.debian.org/debian-security bullseye-security main
deb-src http://security.debian.org/debian-security bullseye-security main
Rafraîchir
1
apt update && apt upgrade
Créer mot de passe “root”
1
passwd
Le paramétrage réseau par défaut /etc/network/interfaces.d/50-cloud-init
Il faut commenter la ligne dns-nameservers 194.9.173.89 2a04:ecc0:4::89 pour utiliser dnsmasq
1
2
3
4
5
6
7
8
9
10
11
12
13
14
15
16
17
18
# This file is generated from information provided by the datasource.  Changes
# to it will not persist across an instance reboot.  To disable cloud-init's
# network configuration capabilities, write a file
# /etc/cloud/cloud.cfg.d/99-disable-network-config.cfg with the following:
# network: {config: disabled}
auto lo
iface lo inet loopback
#    dns-nameservers 194.9.173.89 2a04:ecc0:4::89

auto eth0
iface eth0 inet static
    address 45.145.166.178/24
    gateway 45.145.166.1

# control-alias eth0
iface eth0 inet6 static
    address 2a04:ecc0:8:a8:4567:4989::1/64
    gateway 2a04:ecc0:8:a8::1
Reconfigurer locales
installer le paquet locales-all
1
apt-get install locales-all
NTP avec systemd-timesyncd
Le service ntp de systemd s’appelle systemd-timesyncd.service
La configuration se fait dans /etc/systemd/timesyncd.conf
Si vous utilisez un autre service pour gérer NTP, assurez-vous de le(s) désactiver : ntpd chronyd
Installation
1
sudo apt install systemd-timesyncd
Par défaut
1
systemctl status systemd-timesyncd.service
1
2
3
4
5
6
7
8
9
10
11
● systemd-timesyncd.service - Network Time Synchronization
     Loaded: loaded (/lib/systemd/system/systemd-timesyncd.service; enabled; vendor preset: enabled)
     Active: active (running) since Sun 2022-09-25 02:50:09 UTC; 10h ago
       Docs: man:systemd-timesyncd.service(8)
   Main PID: 10822 (systemd-timesyn)
     Status: "Initial synchronization to time server 188.68.41.203:123 (0.debian.pool.ntp.org)."
      Tasks: 2 (limit: 4698)
     Memory: 1012.0K
        CPU: 54ms
     CGroup: /system.slice/systemd-timesyncd.service
             └─10822 /lib/systemd/systemd-timesyncd
Fuseau Europe/Paris
1
sudo timedatectl set-timezone Europe/Paris
Horloge système synchronisée
1
timedatectl
1
2
3
4
5
6
7
               Local time: dim. 2022-09-25 15:47:44 CEST
           Universal time: dim. 2022-09-25 13:47:44 UTC
                 RTC time: dim. 2022-09-25 13:47:45
                Time zone: Europe/Paris (CEST, +0200)
System clock synchronized: yes
              NTP service: active
          RTC in local TZ: no
dnsmasq
![]()
DNSmasq (installation et configuration)
Installation
1
sudo apt install dnsmasq
Si le paquet resolvconf est installé, dnsmasq utilisera sa sortie plutôt que le contenu de /etc/resolv.conf pour trouver les serveurs de noms en amont. Décommenter la ligne #IGNORE_RESOLVCONF=yes empêche ce comportement.
Notez que l’inclusion d’une ligne resolv-file=<filename> dans /etc/dnsmasq.conf n’est pas suffisante pour remplacer resolvconf si celui-ci est installé : la ligne #IGNORE_RESOLVCONF=yes doit être décommentée.
/etc/default/dnsmasq
1
2
3
4
5
6
7
8
9
10
11
12
13
14
15
16
17
18
19
# Whether or not to run the dnsmasq daemon; set to 0 to disable.
# Note that this is only valid when using SYSV init. For systemd,
# use "systemctl disable dnsmasq"
ENABLED=1

# By default search this drop directory for configuration options.
# Libvirt leaves a file here to make the system dnsmasq play nice.
# Comment out this line if you don't want this. The dpkg-* are file
# endings which cause dnsmasq to skip that file. This avoids pulling
# in backups made by dpkg.
CONFIG_DIR=/etc/dnsmasq.d,.dpkg-dist,.dpkg-old,.dpkg-new

# If the resolvconf package is installed, dnsmasq will use its output
# rather than the contents of /etc/resolv.conf to find upstream
# nameservers. Uncommenting this line inhibits this behaviour.
# Note that including a "resolv-file=<filename>" line in
# /etc/dnsmasq.conf is not enough to override resolvconf if it is
# installed: the line below must be uncommented.
IGNORE_RESOLVCONF=yes
Configuration de dnsmasq avec le fichier /etc/resolv.conf
Vous devez faire en sorte que toutes les requêtes soient envoyées à dnsmasq en ajoutant les adresses localhost comme seuls serveurs de noms dans le fichier /etc/resolv.conf
1
2
3
4
5
#     DO NOT EDIT THIS FILE BY HAND -- YOUR CHANGES WILL BE OVERWRITTEN
# 127.0.0.53 is the systemd-resolved stub resolver.
# run "resolvectl status" to see details about the actual nameservers.

nameserver 127.0.0.1
Ouvrir le fichier /etc/dnsmasq.conf et effectuer les réglages de configuration
1
2
3
4
5
6
7
domain-needed
expand-hosts
localise-queries

interface=lo

resolv-file=/etc/resolv.dnsmasq.conf
Explications
- domain-needed : Ne transmet pas les requêtes ne contenant pas un nom de domaine complet. Par exemple,une requête pour machine ne sera pas transmise aux serveurs DNS de votre FAI, alors qu’une requête pour machine.domain.com le sera.
- Si vous souhaitez qu’un domaine soit automatiquement ajouté aux noms simples dans un fichier hosts, décommentez l’option expand-hosts
- localise-queries : Retourne des réponses aux requêtes DNS dépendantes de l’interface sur laquelle la requête a été reçue, à partir du fichier /etc/hosts. Si un nom dans /etc/hosts a plus d’une adresse associée avec lui, et qu’une des adresses au moins est dans le même sous-réseau que l’interface sur laquelle la requête a été reçue, alors ne retourne que la(les) adresse(s) du sous-réseau considéré. Cela permet d’avoir dans /etc/hosts un serveur avec de multiples adresses, une pour chacune de ses interfaces, et de fournir aux hôtes l’adresse correcte (basée sur le réseau auquel ils sont attachés). Cette possibilité est actuellement limitée à IPv4.
Pour lutter contre la censure sur Internet, FDN fait le choix de mettre à disposition de toutes et tous des résolveurs DNS récursifs ouverts.
Le fichier des dns /etc/resolv.dnsmasq.conf
1
2
3
4
nameserver 80.67.169.12
nameserver 2001:910:800::12
nameserver 80.67.169.40
nameserver 2001:910:800::40
Redémarrer dnsmasq
1
sudo systemctl restart dnsmasq
Vérifications, installer dnsutils au préalable (sudo apt install dnsutils)
Création utilisateur
Utilisateur hmsuser
1
useradd -m -d /home/hmsuser/ -s /bin/bash hmsuser
Mot de passe hmsuser
1
passwd hmsuser
Visudo pour les accès root via utilisateur hmsuser
1
echo "hmsuser     ALL=(ALL) NOPASSWD: ALL" >> /etc/sudoers
Déconnexion puis connexion ssh en mode utilisateur
1
ssh hmsuser@45.145.166.178
OpenSSH, clé et script
![]()
connexion avec clé
sur l'ordinateur de bureau
Générer une paire de clé curve25519-sha256 (ECDH avec Curve25519 et SHA2) pour une liaison SSH avec le serveur.
1
ssh-keygen -t ed25519 -o -a 100 -f ~/.ssh/server32771
Envoyer les clés publiques sur le serveur KVM
1
ssh-copy-id -i ~/.ssh/server32771.pub hmsuser@45.145.166.178
sur le serveur KVM On se connecte
1
ssh hmsuser@45.145.166.178
Modifier la configuration serveur SSH
1
sudo nano /etc/ssh/sshd_config
Modifier
1
2
3
Port = 55178
PermitRootLogin no
PasswordAuthentication no
Relancer openSSH
1
sudo systemctl restart sshd
Accès depuis le poste distant avec la clé privée
1
ssh hmsuser@45.145.166.178 -p 55178 -i ~/.ssh/server32771
Outils, scripts motd et ssh_rc_bash
![]()
Installer utilitaires
1
sudo apt install rsync curl tmux jq figlet git
Motd
1
sudo rm /etc/motd && sudo nano /etc/motd
1
2
3
4
5
6
7
8
9
10
11
12
13
  _  _           _    __  __        ___
 | || | ___  ___| |_ |  \/  | _  _ / __| ___  _ _ __ __ ___  _ _  ___
 | __ |/ _ \(_-<|  _|| |\/| || || |\__ \/ -_)| '_|\ V // -_)| '_|(_-<
 |_||_|\___//__/ \__||_|  |_| \_, ||___/\___||_|   \_/ \___||_|  /__/
                              |__/____ ___  ____  ____  _
      ___ ___  _ _ __ __ ___  _ _|__ /|_  )|__  ||__  |/ |
     (_-</ -_)| '_|\ V // -_)| '_||_ \ / /   / /   / / | |
     /__/\___||_|   \_/ \___||_| |___//___| /_/   /_/  |_|
                         _                          __
     ___  _  _  ___  ___| |_  _  _  __ _  _ _      / _| _ _
    / _ \| || |/ -_)(_-<|  _|| || |/ _` || ' \  _ |  _|| '_|
    \___/ \_,_|\___|/__/ \__| \_, |\__,_||_||_|(_)|_|  |_|
                              |__/
Script ssh_rc_bash
ATTENTION!!! Les scripts sur connexion peuvent poser des problèmes pour des appels externes autres que ssh
1
2
3
wget https://static.xoyaz.xyz/files/ssh_rc_bash
chmod +x ssh_rc_bash # rendre le bash exécutable
./ssh_rc_bash        # exécution
Parefeu UFW
![]()
UFW, ou pare - feu simple , est une interface pour gérer les règles de pare-feu dans Arch Linux, Debian ou Ubuntu. UFW est utilisé via la ligne de commande (bien qu’il dispose d’interfaces graphiques disponibles), et vise à rendre la configuration du pare-feu facile.
Installation Debian / Ubuntu
1
sudo apt install ufw
Par défaut, les jeux de règles d’UFW sont vides, de sorte qu’il n’applique aucune règle de pare-feu, même lorsque le démon est en cours d’exécution.
Les règles
1
2
3
4
sudo ufw allow 55178/tcp  # port SSH
sudo ufw allow http       # port 80
sudo ufw allow https      # port 443
sudo ufw allow DNS        # port 53
Activer le parefeu
1
sudo ufw enable
1
2
Command may disrupt existing ssh connections. Proceed with operation (y|n)? y
Firewall is active and enabled on system startup
Status
1
 sudo ufw status verbose
1
2
3
4
5
6
7
8
9
10
11
12
13
14
15
Status: active
Logging: on (low)
Default: deny (incoming), allow (outgoing), disabled (routed)
New profiles: skip

To                         Action      From
--                         ------      ----
55178/tcp                  ALLOW IN    Anywhere
80/tcp                     ALLOW IN    Anywhere
443                        ALLOW IN    Anywhere
53 (DNS)                   ALLOW IN    Anywhere
55178/tcp (v6)             ALLOW IN    Anywhere (v6)
80/tcp (v6)                ALLOW IN    Anywhere (v6)
443 (v6)                   ALLOW IN    Anywhere (v6)
53 (DNS (v6))              ALLOW IN    Anywhere (v6)
Nginx compilé
![]()
Utilisateur avec droits sudo
Télécharger le bash
1
2
3
wget https://static.xoyaz.xyz/files/compilation-nginx-tls1.3.sh
chmod +x compilation-nginx-tls1.3.sh # rendre le bash exécutable
./compilation-nginx-tls1.3.sh        # exécution
A la fin de la compilation
1
2
3
Versions Nginx OpenSSL
nginx version: nginx/1.20.2
OpenSSL 1.1.1n  15 Mar 2022
Domaine et certificats
Se connecter sur HMS pour configurer le reverse dns
45.145.166.178 –> ouestyan.fr
Demander par ticket la modification du reverse dns ipv6
2a04:ecc0:8:a8:4567:4989:0:1 –> ouestyan.fr
Changer le hostname
1
2
sudo hostnamectl set-hostname ouestyan.fr
hostnamectl
1
2
3
4
5
6
7
8
9
   Static hostname: ouestyan.fr
         Icon name: computer-vm
           Chassis: vm
        Machine ID: 0e0cc9839fc64a049ba55e3248fab176
           Boot ID: f3913f931a8b4090a7d40ac500e2db0f
    Virtualization: kvm
  Operating System: Debian GNU/Linux 11 (bullseye)
            Kernel: Linux 5.10.0-18-cloud-amd64
      Architecture: x86-64
OVH domaine ouestyan.fr
![]()
OVH configuration domaine ouestyan.fr
1
2
3
4
5
6
7
8
9
10
$TTL 3600
@	IN SOA dns17.ovh.net. tech.ovh.net. (2022092612 86400 3600 3600000 60)
         IN NS     ns17.ovh.net.
         IN NS     dns17.ovh.net.
         IN MX     10 ouestyan.fr.
         IN A      45.145.166.178
         IN AAAA   2a04:ecc0:8:a8:4567:4989::1
         IN CAA    128 issue "letsencrypt.org"
*        IN A      45.145.166.178
*        IN AAAA   2a04:ecc0:8:a8:4567:4989::1
Certificats Let’s Encrypt
![]()
Installation gestionnaire des certificats Let’s Encrypt
1
2
3
4
5
cd ~
# socat est prérequis (installé par défaut)
git clone https://github.com/acmesh-official/acme.sh.git
cd acme.sh
./acme.sh --install
Se reconnecter
Exporter les clés OVH API
Génération des certificats
1
acme.sh --dns dns_ovh --server letsencrypt --issue --keylength ec-384 -d 'ouestyan.fr' -d '*.ouestyan.fr'
Ouvrir le lien d’authentification et relancer la commande précédente après le message “OVH authentication Success !” et patienter…
Résultat de l’installation
1
2
3
4
[lun. 26 sept. 2022 08:36:37 CEST] Your cert is in: /home/hmsuser//.acme.sh/ouestyan.fr_ecc/ouestyan.fr.cer
[lun. 26 sept. 2022 08:36:37 CEST] Your cert key is in: /home/hmsuser//.acme.sh/ouestyan.fr_ecc/ouestyan.fr.key
[lun. 26 sept. 2022 08:36:38 CEST] The intermediate CA cert is in: /home/hmsuser//.acme.sh/ouestyan.fr_ecc/ca.cer
[lun. 26 sept. 2022 08:36:38 CEST] And the full chain certs is there: /home/hmsuser//.acme.sh/ouestyan.fr_ecc/fullchain.cer
Installation des certificats
1
2
3
sudo mkdir -p /etc/ssl/private/
sudo chown $USER -R /etc/ssl/private/
acme.sh --ecc --install-cert -d 'ouestyan.fr' -d '*.ouestyan.fr' --key-file /etc/ssl/private/ouestyan.fr-key.pem --fullchain-file /etc/ssl/private/ouestyan.fr-fullchain.pem  --reloadcmd 'sudo systemctl reload nginx.service'
Supprimer ` –reloadcmd ‘sudo systemctl reload nginx.service’` à la ligne précédente si Nginx n’est pas installé
Editer le crontab
1
crontab -e
1
13 0 * * * "/home/hmsuser/.acme.sh"/acme.sh --cron --home "/home/hmsuser/.acme.sh" --renew-hook "/home/hmsuser/.acme.sh/acme.sh --ecc --install-cert -d 'ouestyan.fr' -d '*.ouestyan.fr' --key-file /etc/ssl/private/ouestyan.fr-key.pem --fullchain-file /etc/ssl/private/ouestyan.fr-fullchain.pem  --reloadcmd 'sudo systemctl reload nginx.service'" > /dev/null
Nginx security.conf.inc
Créer un fichier pour un regroupement /etc/nginx/conf.d/security.conf.inc mode intermédiaire
1
2
3
4
5
6
7
8
9
10
11
12
13
14
15
16
17
18
19
20
21
22
23
24
25
26
27
28
29
30
31
32
33
34
35
36
37
38
39
40
41
42
43
44
45
46
47
48
   # /etc/nginx/conf.d/security.conf.inc
	ssl_session_timeout 1d;
	ssl_session_cache shared:SSL:50m;  # about 200000 sessions
	ssl_session_tickets off;


	# intermediate configuration
        ssl_protocols TLSv1.2 TLSv1.3;
        ssl_ciphers ECDHE-ECDSA-AES128-GCM-SHA256:ECDHE-RSA-AES128-GCM-SHA256:ECDHE-ECDSA-AES256-GCM-SHA384:ECDHE-RSA-AES256-GCM-SHA384:ECDHE-ECDSA-CHACHA20-POLY1305:ECDHE-RSA-CHACHA20-POLY1305:DHE-RSA-AES128-GCM-SHA256:DHE-RSA-AES256-GCM-SHA384;
        ssl_prefer_server_ciphers off;

        # Pre-defined FFDHE group (RFC 7919)
        # From https://ssl-config.mozilla.org/ffdhe2048.txt
        # https://security.stackexchange.com/a/149818
        ssl_dhparam /etc/ssl/private/ffdhe2048.pem;

	# Follows the Web Security Directives from the Mozilla Dev Lab and the Mozilla Obervatory + Partners
	# https://wiki.mozilla.org/Security/Guidelines/Web_Security
	# https://observatory.mozilla.org/

	more_set_headers "Content-Security-Policy : upgrade-insecure-requests";
	more_set_headers "Referrer-Policy: same-origin;"

	more_set_headers "X-Content-Type-Options : nosniff";
	more_set_headers "X-XSS-Protection : 1; mode=block";
	more_set_headers "X-Download-Options : noopen";
	more_set_headers "X-Permitted-Cross-Domain-Policies : none";
	more_set_headers "X-Frame-Options : SAMEORIGIN";

	# Disable the disaster privacy thing that is FLoC
	more_set_headers "Permissions-Policy : interest-cohort=()";

	# Disable gzip to protect against BREACH
	# Read https://trac.nginx.org/nginx/ticket/1720 (text/ cannot be disabled!)
	gzip off;

   # Certificats Let's Encrypt
   ssl_certificate /etc/ssl/private/ouestyan.fr-fullchain.pem;
   ssl_certificate_key /etc/ssl/private/ouestyan.fr-key.pem;

   # HSTS (ngx_http_headers_module is required) (63072000 seconds)
   more_set_headers "Strict-Transport-Security : max-age=63072000; includeSubDomains; preload";

   # OCSP settings
   ssl_stapling on;
   ssl_stapling_verify on;
   ssl_trusted_certificate /etc/ssl/private/ouestyan.fr-fullchain.pem;
   resolver 1.1.1.1;
Dans tous les Vhosts, il faut ajouter l’inclusion du fichier : include /etc/nginx/conf.d/security.conf.inc;
Fail2ban
Installer et configurer Fail2ban + UFW sur Debian 11
Notifications
Il faut demander l'ouverture du port 25 au fournisseur du VPS
Le serveur doit pouvoir expédier des messages de notification par messagerie
- Il faut ajouter le port TCP 25 au parefeu :
sudo ufw allow 25 - Configurer DNS de votre fournisseur de domaine, ici OVH
Ajouter enregistrement MX : IN MX 10 ouestyan.fr. (le point est obligatoire après fr) - Procédures d’installation et paramétrage → Debian - Installer et configurer Postfix comme serveur SMTP d’envoi uniquement
Test envoi message
1
echo "Test envoi via postfix smtp" | mail -s "serveur debian" root
Docker
Docker + Docker Compose sur Debian, installation et utilisation
- Docker Engine ou Docker Daemon correspondant au processus qui fait tourner Docker sur le système, en charge de la génération et l’exécution des containers
- Docker Registry est un emplacement de stockage pour héberger les images de containers Docker (il peut être public ou privé)
- Docker Image correspondant à un fichier qui contient la définition d’un container Docker (dépendances, configuration, etc.)
- Docker Client correspondant à l’utilitaire en ligne de commande qui va permettre de gérer les containers (commande “docker”)
- Docker Container correspondant aux containers en eux-mêmes, tout en sachant qu’une image peut permettre de créer plusieurs containers avec chacun un identifiant unique
Sauvegardes
Données /srv/datayan
Le dossier datayan va contenir tous les dossiers de données :
BiblioCalibre CalibreTechnique media musique static www
L’utilisateur doit avoir un ID=1000
Opérations sur le serveur HostMyServers server32771 (yanfi.space)
Dans l’installation de base debian 11, l’utilisateur à un ID=1000
Ajouter cet utilisateur au groupe users
1
sudo usermod -a -G users $USER
Vérifier : id $USER → uid=1000(hmsuser) gid=1000(hmsuser) groups=1000(hmsuser),100(users)
Créer le dossier
1
sudo mkdir -p /srv/datayan
Donner les droits
1
sudo chown $USER:users -R /srv/datayan
BorgBackup
![]()
Installer borg : sudo apt install borg
Créer un utilisateur borg et son répertoire “home” → /srv/data/borg-backups : sudo useradd -d /srv/data -m -r -U borg
Les clés publiques des serveurs autorisés se trouvent dans le fichier authorized_keys de l’utilisateur borg
1
2
3
4
5
6
root@ouestyan:/home/hmsuser# su - borg
$ pwd
/srv/data/borg-backups
$ cat .ssh/authorized_keys
ssh-ed25519 AAAAC3NzaC1lZDI1NTE5AAAAIMs2JATwIa9fPOk0gfOgm4YNIT9ZKfWwpXDamzZ5dVsh root@ouestline.xyz
ssh-ed25519 AAAAC3NzaC1lZDI1NTE5AAAAIPuVXP+pUjvedC/htJmKXamAotLESDCRqU0MOoD7vqCA root@422x.l.time4vps.cloud
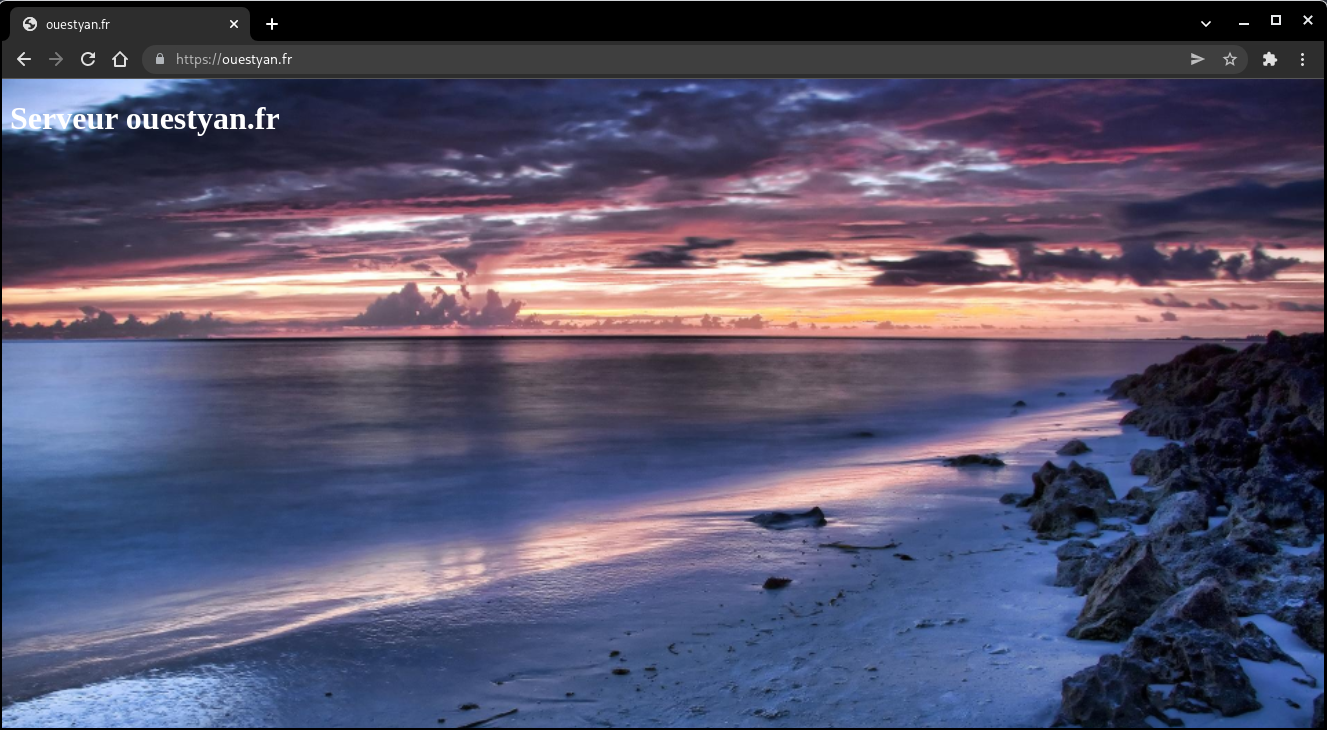
ouestyan.fr
Accueil
Déposer une image wallpaper.jpg dans le dossier /var/www/default-www
Créer un fichier /var/www/default-www/index/
``/ <!DOCTYPE/> />
Serveur ouestyan.fr
</>
1
2
3
4
5
6
7
8
9
10
11
12
13
14
15
16
17
18
19
20
21
22
23
24
25
26
27
28
29
30

**ouestyan.fr.conf**

Créer le fichier `/etc/nginx/conf.d/ouestyan.fr.conf`

```nginx
server {
    listen 80;
    listen [::]:80;
    server_name ouestyan.fr;
    return 301 https://$host$request_uri;
}
# /etc/nginx/conf.d/ouestyan.fr.conf


server {
    listen 443 ssl http2;
    listen [::]:443 ssl http2;
    server_name ouestyan.fr;

    root /var/www/default-www;
    index index/;

    include /etc/nginx/conf.d/security.conf.inc;

    #include /etc/nginx/conf.d/ouestyan.fr.d/*.conf;

    access_log /var/log/nginx/ouestyan.fr-access.log;
    error_log /var/log/nginx/ouestyan.fr-error.log;
}
Lien https://ouestyan.fr
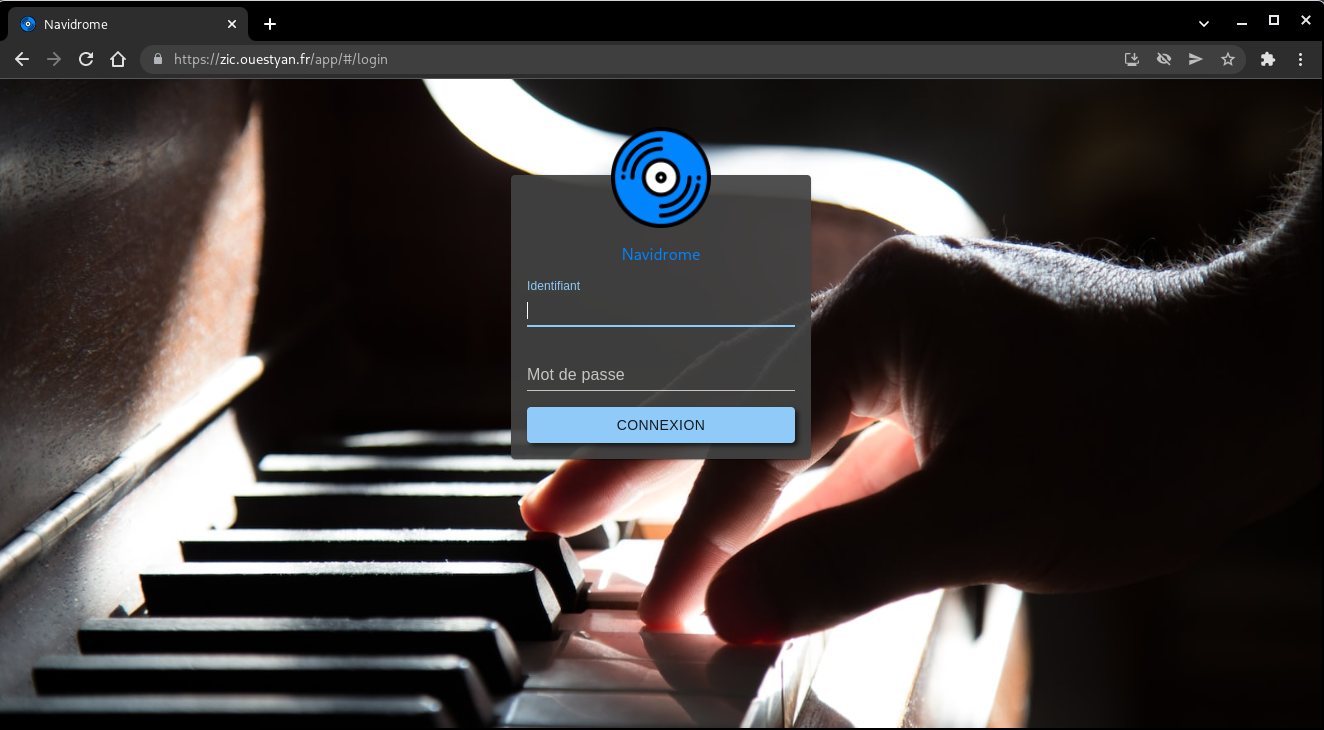
Navidrome
Audio Navidrome, installation sur debian
Installation navidrome
1
2
3
4
5
6
7
8
9
10
11
12
13
# Conditions préalables à la mise à jour et à l’installation
sudo apt update && sudo apt upgrade
sudo apt install libtag1-dev ffmpeg
# Utilisateur “navidrome”
sudo useradd -r -s /bin/false navidrome
# Créez un répertoire pour stocker l’exécutable Navidrome
# et un répertoire de travail avec les permissions appropriées
sudo install -d -o navidrome -g navidrome /opt/navidrome
sudo install -d -o navidrome -g navidrome /var/lib/navidrome
# On utilise la version compilée disponible sous ~/navidrome
sudo mv navidrome /opt/navidrome/
sudo chown -R navidrome:navidrome /opt/navidrome
sudo chmod +x /opt/navidrome/navidrome
Fichier de configuration navidrome.toml : sudo nano /var/lib/navidrome/navidrome.toml
1
2
MusicFolder = "/srv/datayan/musique"
ND_PLAYLISTSPATH = "Playlists"
unité Systemd navidrome.service : sudo nano /etc/systemd/system/navidrome.service
1
2
3
4
5
6
7
8
9
10
11
12
13
14
15
16
17
18
19
20
21
22
23
24
25
26
27
28
29
30
31
32
33
34
35
36
37
38
39
40
41
42
43
44
45
46
47
[Unit]
Description=Navidrome Music Server and Streamer compatible with Subsonic/Airsonic
After=remote-fs.target network.target
AssertPathExists=/var/lib/navidrome

[Install]
WantedBy=multi-user.target

[Service]
User=navidrome
Group=navidrome
Type=simple
ExecStart=/opt/navidrome/navidrome --configfile "/var/lib/navidrome/navidrome.toml"
WorkingDirectory=/var/lib/navidrome
TimeoutStopSec=20
KillMode=process
Restart=on-failure

# See https://www.freedesktop.org/software/systemd/man/systemd.exec/
DevicePolicy=closed
NoNewPrivileges=yes
PrivateTmp=yes
PrivateUsers=yes
ProtectControlGroups=yes
ProtectKernelModules=yes
ProtectKernelTunables=yes
RestrictAddressFamilies=AF_UNIX AF_INET AF_INET6
RestrictNamespaces=yes
RestrictRealtime=yes
SystemCallFilter=~@clock @debug @module @mount @obsolete @reboot @setuid @swap
ReadWritePaths=/var/lib/navidrome

# You can uncomment the following line if you're not using the jukebox This
# will prevent navidrome from accessing any real (physical) devices
#PrivateDevices=yes

# You can change the following line to `strict` instead of `full` if you don't
# want navidrome to be able to write anything on your filesystem outside of
# /var/lib/navidrome.
ProtectSystem=full

# You can uncomment the following line if you don't have any media in /home/*.
# This will prevent navidrome from ever reading/writing anything there.
#ProtectHome=true

# You can customize some Navidrome config options by setting environment variables here. Ex:
#Environment=ND_BASEURL="/navidrome"
lancer le service
1
2
3
sudo systemctl daemon-reload
sudo systemctl start navidrome.service
sudo systemctl enable navidrome.service
Tester navidrome, exécuter la commande sur un poste local ayant accès via ssh au serveur distant
1
ssh -L 9500:localhost:4533 hmsuser@45.145.166.178 -p 55178 -i /home/yann/.ssh/server32771
Ouvrir le lien localhost:9500 dans un navigateur
Proxy nginx zic.ouestyan.fr
Le fichier de configuration nginx /etc/nginx/conf.d/zic.ouestyan.fr.conf
1
2
3
4
5
6
7
8
9
10
11
12
13
14
15
16
17
18
server {
    listen 80;
    listen [::]:80;
    server_name zic.ouestyan.fr;
    return 301 https://$host$request_uri;
}
server {
    listen 443 ssl http2;
    listen [::]:443 ssl http2;
    server_name zic.ouestyan.fr;

    include /etc/nginx/conf.d/security.conf.inc;

    location / {
        proxy_pass              http://127.0.0.1:4533;
    }

}
Valider et recharger ginx
1
2
sudo nginx -t
sudo systemctl reload nginx
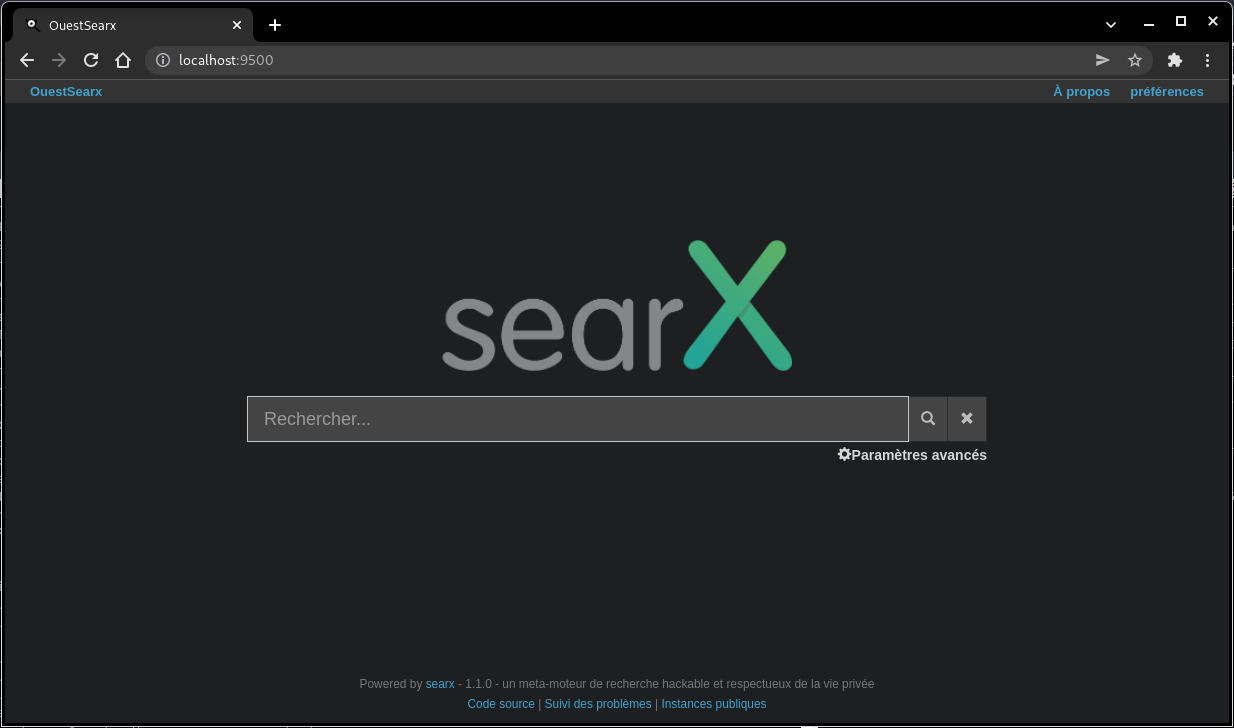
Searx
Installation des paquets prérequis
1
2
3
4
5
sudo -H apt-get install -y \
    python3-dev python3-babel python3-venv \
    uwsgi uwsgi-plugin-python3 \
    git build-essential libxslt-dev zlib1g-dev libffi-dev libssl-dev \
    shellcheck
Créer un utilisateur système
1
2
3
4
5
6
sudo -H useradd --shell /bin/bash --system \
    --home-dir "/usr/local/searx" \
    --comment 'Privacy-respecting metasearch engine' searx

sudo -H mkdir "/usr/local/searx"
sudo -H chown -R "searx:searx" "/usr/local/searx"
Installer searx et les dépendances
1
2
3
4
5
6
7
8
# basculer sur utilisateur searx
sudo -H -u searx -i
# le prompt : searx@ouestyan:~$
# cloner le dépôt
git clone "https://github.com/searx/searx.git" "/usr/local/searx/searx-src"
# créer virtualenv
python3 -m venv "/usr/local/searx/searx-pyenv"
echo ". /usr/local/searx/searx-pyenv/bin/activate" >>  "/usr/local/searx/.profile"
Pour installer les dépendances de searx, quittez la session bash searx que vous avez ouverte ci-dessus et redémarrez-en une nouvelle.
Avant l’installation, vérifiez d’abord si votre virtualenv provient du login (~/.profile) :
1
2
3
4
5
6
7
8
9
10
11
12
13
14
hmsuser@ouestyan:~$ sudo -H -u searx -i
(searx-pyenv) searx@ouestyan:~$ command -v python && python --version
/usr/local/searx/searx-pyenv/bin/python
Python 3.9.2

# update pip's boilerplate ..
pip install -U pip
pip install -U setuptools
pip install -U wheel
pip install -U pyyaml

# jump to searx's working tree and install searx into virtualenv
(searx-pyenv) searx@ouestyan:~$ cd "/usr/local/searx/searx-src"
(searx-pyenv) searx@ouestyan:~$ pip install -e .
Configuration
Ouvrez un deuxième terminal pour les tâches de configuration
Pour créer un /etc/searx/settings.yml initial, vous pouvez commencer par une copie du fichier Origin : utils/templates/etc/searx/use_default_settings.yml. Cette configuration utilise les paramètres par défaut de Origin : searx/settings.yml et est recommandée depuis la fusion du PR 2291.
Pour une installation minimale, configurez comme indiqué ci-dessous - remplacez searx@$(uname -n) par un nom de votre choix, définissez ultrasecretkey - et/ou modifiez /etc/searx/settings.yml selon vos besoins.
1
2
3
4
5
6
7
# paramètres searx
sudo -H mkdir -p "/etc/searx"
sudo -H cp "/usr/local/searx/searx-src/searx/settings.yml" \
             "/etc/searx/settings.yml"
# minimal setup
sudo -H sed -i -e "s/ultrasecretkey/$(openssl rand -hex 16)/g" "/etc/searx/settings.yml"
sudo -H sed -i -e "s/{instance_name}/searx@$(uname -n)/g" "/etc/searx/settings.yml"
Modifier le fichier de paramétrage /etc/searx/settings.yml
1
2
3
4
5
6
7
8
9
10
11
12
13
14
15
16
17
18
19
20
21
22
23
24
25
26
27
28
29
30
31
32
33
34
35
36
37
38
39
40
41
42
43
44
45
46
47
48
49
50
51
52
53
54
55
56
57
58
59
60
61
62
63
64
65
66
67
68
69
70
71
72
73
74
75
76
77
78
79
80
81
82
83
84
85
86
87
88
89
90
91
92
93
94
95
96
97
98
99
100
101
102
103
104
general:

    instance_name : "OuestSearx" # displayed name

ui:
    theme_args :
        oscar_style : logicodev-dark # default style of oscar
    results_on_new_tab: True  # Open result links in a new tab by default

# supprimer la ligne 'disabled : True' des éléments ci dessous ou positionner 'disabled : False'

  - name : ddg definitions
    engine : duckduckgo_definitions
    shortcut : ddd
    weight : 2

  - name : duckduckgo
    engine : duckduckgo
    shortcut : ddg

  - name : duckduckgo images
    engine : duckduckgo_images
    shortcut : ddi
    timeout: 3.0

  - name : startpage
    engine : startpage
    shortcut : sp
    timeout : 6.0
    disabled : False
    additional_tests:
      rosebud: *test_rosebud

# facultatif
# ajouter ligne 'disabled : True' sur certains éléments de la liste

  - name : bing
    engine : bing
    shortcut : bi
    disabled : True

  - name : bing images
    engine : bing_images
    shortcut : bii
    disabled : True

  - name : bing news
    engine : bing_news
    shortcut : bin
    disabled : True

  - name : bing videos
    engine : bing_videos
    shortcut : biv
    disabled : True

  - name : wikidata
    engine : wikidata
    shortcut : wd
    timeout : 3.0
    weight : 2
    tests: *tests_infobox
    disabled : True

  - name : google
    engine : google
    shortcut : go
    use_mobile_ui: false
    # additional_tests:
    #   android: *test_android
    disabled : True

  - name : google images
    engine : google_images
    shortcut : goi
    # additional_tests:
    #   android: *test_android
    #   dali:
    #     matrix:
    #       query: ['Dali Christ']
    #       lang: ['en', 'de', 'fr', 'zh-CN']
    #     result_container:
    #       - ['one_title_contains', 'Salvador']
    disabled : True

  - name : google news
    engine : google_news
    shortcut : gon
    # additional_tests:
    #   android: *test_android
    disabled : True

  - name : google videos
    engine : google_videos
    shortcut : gov
    # additional_tests:
    #   android: *test_android
    disabled : True

  - name : google scholar
    engine : google_scholar
    shortcut : gos
    disabled : True
Vérifier en local
Pour vérifier votre configuration searx, vous pouvez activer le débogage et démarrer la webapp. Searx recherche un fichier de configuration dans l’environnement exporté $SEARX_SETTINGS_PATH
1
2
3
4
5
6
7
8
9
10
11
# dans le second terminal (hmsuser@ouestyan:~$)
# enable debug ..
sudo -H sed -i -e "s/debug : False/debug : True/g" "/etc/searx/settings.yml"

# start webapp
$ sudo -H -u searx -i
# prompt --> (searx-pyenv) searx@ouestyan:~$
cd /usr/local/searx/searx-src
export SEARX_SETTINGS_PATH="/etc/searx/settings.yml"
# lancement de la webapp
python searx/webapp.py
Ouvrez un navigateur WEB et visitez http:// . Si vous êtes dans un conteneur ou dans un script, testez avec curl dans le second terminal
1
curl --location --verbose --head --insecure localhost:8888
1
2
3
4
5
6
7
8
9
10
11
*   Trying 127.0.0.1:8888...
* Connected to localhost (127.0.0.1) port 8888 (#0)
> GET / HTTP/1.1
> Host: localhost:8888
> User-Agent: curl/7.74.0
> Accept: */*
>
* Mark bundle as not supporting multiuse
* HTTP 1.0, assume close after body
< HTTP/1.0 200 OK
[...]
Si tout fonctionne bien, appuyez sur [CTRL-C] pour arrêter la webapp et désactiver l’option de débogage dans settings.yml.
1
2
# disable debug
$ sudo -H sed -i -e "s/debug : True/debug : False/g" "/etc/searx/settings.yml"
Vous pouvez maintenant quitter searx en mode bash (entrez deux fois la commande exit). À ce stade, searx n’est pas un daemon , uwsgi le permet.
uwsgi
Créer le fichier /etc/uwsgi/apps-available/searx.ini
1
2
3
4
5
6
7
8
9
10
11
12
13
14
15
16
17
18
19
20
21
22
23
24
25
26
27
28
29
30
31
32
33
34
35
36
37
38
39
40
41
42
43
44
45
46
47
48
49
50
51
52
53
54
55
56
57
58
59
60
61
62
63
64
65
66
67
68
69
70
71
72
73
74
75
76
77
78
79
80
81
82
83
84
85
86
87
[uwsgi]

# uWSGI core
# ----------
#
# https://uwsgi-docs.readthedocs.io/en/latest/Options/#uwsgi-core

# Who will run the code
uid = searx
gid = searx

# set (python) default encoding UTF-8
env = LANG=C.UTF-8
env = LANGUAGE=C.UTF-8
env = LC_ALL=C.UTF-8

# chdir to specified directory before apps loading
chdir = /usr/local/searx/searx-src/searx

# searx configuration (settings.yml)
env = SEARX_SETTINGS_PATH=/etc/searx/settings.yml

# disable logging for privacy
disable-logging = true

# The right granted on the created socket
chmod-socket = 666

# Plugin to use and interpreter config
single-interpreter = true

# enable master process
master = true

# load apps in each worker instead of the master
lazy-apps = true

# load uWSGI plugins
plugin = python3,http

# By default the Python plugin does not initialize the GIL.  This means your
# app-generated threads will not run.  If you need threads, remember to enable
# them with enable-threads.  Running uWSGI in multithreading mode (with the
# threads options) will automatically enable threading support. This *strange*
# default behaviour is for performance reasons.
enable-threads = true


# plugin: python
# --------------
#
# https://uwsgi-docs.readthedocs.io/en/latest/Options/#plugin-python

# load a WSGI module
module = searx.webapp

# set PYTHONHOME/virtualenv
virtualenv = /usr/local/searx/searx-pyenv

# add directory (or glob) to pythonpath
pythonpath = /usr/local/searx/searx-src


# speak to upstream
# -----------------
#
# Activate the 'http' configuration for filtron or activate the 'socket'
# configuration if you setup your HTTP server to use uWSGI protocol via sockets.

# using IP:
#
# https://uwsgi-docs.readthedocs.io/en/latest/Options/#plugin-http
# Native HTTP support: https://uwsgi-docs.readthedocs.io/en/latest/HTTP/

http = 127.0.0.1:8888

# using unix-sockets:
#
# On some distributions you need to create the app folder for the sockets::
#
#   mkdir -p /run/uwsgi/app/searx
#   chown -R searx:searx  /run/uwsgi/app/searx
#
# socket = /run/uwsgi/app/searx/socket

# Cache
cache2 = name=searxcache,items=2000,blocks=2000,blocksize=4096,bitmap=1
Activer le fichier ini
1
sudo -H ln -s /etc/uwsgi/apps-available/searx.ini /etc/uwsgi/apps-enabled/
Démarrer le service
1
sudo -H service uwsgi start searx
Tester localement pour vérifier : curl --location --verbose --head --insecure localhost:8888
Tester à partir d’un poste distant
Exécuter sur un poste distant
1
ssh -L 9500:localhost:8888 hmsuser@45.145.166.178 -p 55178 -i /home/yann/.ssh/server32771
Sur le même poste , ouvrir le navigateur avec un lien http://localhost:9500
Après toute modification du fichier de configuration /etc/searx/settings.yml, il faut redémarrer le service uwsgi par la commande sudo systemctl restart uwsgi
nginx proxy searx
Le fichier de configuration nginx /etc/nginx/conf.d/searx.ouestyan.fr.conf
1
2
3
4
5
6
7
8
9
10
11
12
13
14
15
16
17
18
19
20
21
22
23
server {
    listen 80;
    listen [::]:80;
    server_name searx.ouestyan.fr;
    return 301 https://$host$request_uri;
}
server {
    listen 443 ssl http2;
    listen [::]:443 ssl http2;
    server_name searx.ouestyan.fr;

    include /etc/nginx/conf.d/security.conf.inc;

    location / {
      proxy_pass http://127.0.0.1:8888;

      proxy_set_header Host $host;
      proxy_set_header Connection       $http_connection;
      proxy_set_header X-Forwarded-For  $proxy_add_x_forwarded_for;
      proxy_set_header X-Scheme         $scheme;
      proxy_buffering                   off;
    }
}
Valider et recharger ginx
1
2
sudo nginx -t
sudo systemctl reload nginx
Lien https://searx.ouestyan.fr
Nextcloud
Transmission Torrent
Installation Transmission Torrent
Installer transmission-daemon
Liste des commandes
1
2
3
sudo apt install transmission-cli transmission-common transmission-daemon
sudo systemctl stop transmission-daemon
sudo usermod -a -G debian-transmission $USER
Proxy nginx
Reverse proxy nginx /etc/nginx/conf.d/transmission.ouestyan.fr.conf
1
2
3
4
5
6
7
8
9
10
11
12
13
14
15
16
17
18
19
20
21
22
23
24
25
26
27
28
29
30
31
32
33
34
35
36
37
38
39
40
41
42
43
44
45
46
47
48
49
50
51
52
53
54
55
56
57
58
59
60
61
upstream transmission  {
    server 127.0.0.1:9091;
}

server {
    listen 80;
    listen [::]:80;
    server_name transmission.ouestyan.fr;
    return 301 https://$host$request_uri;
}
server {
    listen 443 ssl http2;
    listen [::]:443 ssl http2;
    server_name transmission.ouestyan.fr;

    include /etc/nginx/conf.d/security.conf.inc;

    access_log /var/log/nginx/trans-access.log;
    error_log /var/log/nginx/trans-error.log;

    location / {
    return 301 https://$server_name/transmission/;
		location ^~ /transmission {
		    proxy_set_header X-Real-IP $remote_addr;
		    proxy_set_header X-Forwarded-For $proxy_add_x_forwarded_for;
		    proxy_set_header Host $http_host;
		    proxy_set_header Connection "";
		    proxy_pass_header X-Transmission-Session-Id;

			  location /transmission/rpc {
			    proxy_pass http://transmission;
			  }
			  location /transmission/web/ {
			    proxy_pass http://transmission;
			  }
			  location /transmission/upload {
			    proxy_pass http://transmission;
			  }
			  location /transmission/web/style/ {
			    alias /usr/share/transmission/web/style/;
			  }
			  location /transmission/web/javascript/ {
			    alias /usr/share/transmission/web/javascript/;
			  }
			  location /transmission/web/images/ {
			    alias /usr/share/transmission/web/images/;
			  }
			  location /transmission/ {
			    return 301 http://$server_name/transmission/web;
			  }
			  location /transmission/downloads/ {
			    alias /srv/transmission/completed/;
			    charset UTF-8;
			    autoindex on;
			    autoindex_exact_size off;
		     }
		 }

}

}
Dossiers et configuration
Créer les différents dossiers pour le suivi des téléchargements
1
2
3
4
sudo mkdir -p /srv/transmission/{watched,completed,progress}
# les droits
chown debian-transmission:www-data -R /srv/transmission/completed
chown debian-transmission:debian-transmission -R /srv/transmission/{watched,progress}
Modifier le fichier /var/lib/transmission-daemon/info/settings.json
1
2
3
4
5
6
7
8
9
10
11
12
13
14
15
16
17
18
19
20
21
"download-dir": "/srv/transmission/completed",
"incomplete-dir": "/srv/transmission/progress",

"rpc-authentication-required": true, // Activation de l’auth par mot de passe
"rpc-url": "/",
"rpc-bind-address": "0.0.0.0", // 127.0.0.1 pour écouter en local
"rpc-enabled": true, // Activation de l’interface web
"rpc-password": "MOT_DE_PASSE", // Tapez votre mot de passe, il sera salé au reload
"rpc-port": 9091, // Port d’écoute
"rpc-url": "/transmission/", // Correspond à l’URL d’accès
"rpc-username": "UTILISATEUR", // Nom d’utilisateur pour l’auth
"rpc-host-whitelist": "",
"rpc-host-whitelist-enabled": false,
"rpc-whitelist": "127.0.0.1", // IPs à whitelist
"rpc-whitelist-enabled": true, // Activation de la whitelist

# en fin de fichier
    "utp-enabled": true,
    "watch-dir": "/srv/transmission/watched",
    "watch-dir-enabled": true
}
le fichier json complet
1
2
3
4
5
6
7
8
9
10
11
12
13
14
15
16
17
18
19
20
21
22
23
24
25
26
27
28
29
30
31
32
33
34
35
36
37
38
39
40
41
42
43
44
45
46
47
48
49
50
51
52
53
54
55
56
57
58
59
60
61
62
63
64
65
66
67
68
69
70
{
    "alt-speed-down": 50,
    "alt-speed-enabled": false,
    "alt-speed-time-begin": 540,
    "alt-speed-time-day": 127,
    "alt-speed-time-enabled": false,
    "alt-speed-time-end": 1020,
    "alt-speed-up": 50,
    "bind-address-ipv4": "0.0.0.0",
    "bind-address-ipv6": "::",
    "blocklist-enabled": false,
    "blocklist-url": "http://www.example.com/blocklist",
    "cache-size-mb": 4,
    "dht-enabled": true,
    "download-dir": "/srv/transmission/completed",
    "download-queue-enabled": true,
    "download-queue-size": 5,
    "encryption": 1,
    "idle-seeding-limit": 30,
    "idle-seeding-limit-enabled": false,
    "incomplete-dir": "/srv/transmission/progress",
    "incomplete-dir-enabled": false,
    "lpd-enabled": false,
    "message-level": 1,
    "peer-congestion-algorithm": "",
    "peer-id-ttl-hours": 6,
    "peer-limit-global": 200,
    "peer-limit-per-torrent": 50,
    "peer-port": 51413,
    "peer-port-random-high": 65535,
    "peer-port-random-low": 49152,
    "peer-port-random-on-start": false,
    "peer-socket-tos": "default",
    "pex-enabled": true,
    "port-forwarding-enabled": true,
    "preallocation": 1,
    "prefetch-enabled": true,
    "queue-stalled-enabled": true,
    "queue-stalled-minutes": 30,
    "ratio-limit": 2,
    "ratio-limit-enabled": false,
    "rename-partial-files": true,
    "rpc-authentication-required": false,
    "rpc-bind-address": "127.0.0.1",
    "rpc-enabled": true,
    "rpc-host-whitelist": "",
    "rpc-host-whitelist-enabled": false,
    "rpc-password": "{971fed709da0e448d0dec7ed65fe2600ce3ce916OvFJeoc6",
    "rpc-port": 9091,
    "rpc-url": "/transmission/",
    "rpc-username": "yannick",
    "rpc-whitelist": "127.0.0.1,::1",
    "rpc-whitelist-enabled": true,
    "scrape-paused-torrents-enabled": true,
    "script-torrent-done-enabled": false,
    "script-torrent-done-filename": "",
    "seed-queue-enabled": false,
    "seed-queue-size": 10,
    "speed-limit-down": 100,
    "speed-limit-down-enabled": false,
    "speed-limit-up": 100,
    "speed-limit-up-enabled": false,
    "start-added-torrents": true,
    "trash-original-torrent-files": false,
    "umask": 18,
    "upload-slots-per-torrent": 14,
    "utp-enabled": true,
    "watch-dir": "/srv/transmission/watched",
    "watch-dir-enabled": true
}
Pour éviter l’erreur “ transmission UDP Failed to set receive buffer …” , en mode su
1
2
3
4
sudo -s
echo "net.core.rmem_max = 4194304" >> /etc/sysctl.conf
echo "net.core.wmem_max = 1048576" >> /etc/sysctl.conf
sysctl -p
Redémarrer le service
1
sudo systemctl start transmission-daemon
A chaque modification (en mode su)
1
2
3
4
5
systemctl stop transmission-daemon
rm /var/lib/transmission-daemon/.config/transmission-daemon/settings.json
rm /etc/transmission-daemon/settings.json
# créer
nano /var/lib/transmission-daemon/info/settings.json
transmission.ouestyan.fr
Connexion sur le lien https://transmission.ouestyan.fr
![]()
Saisir “yannick” et son mot de passe
Test de sécurité
Analyse SSL contre le site Web pour trouver le score et la vulnérabilité essentielle.
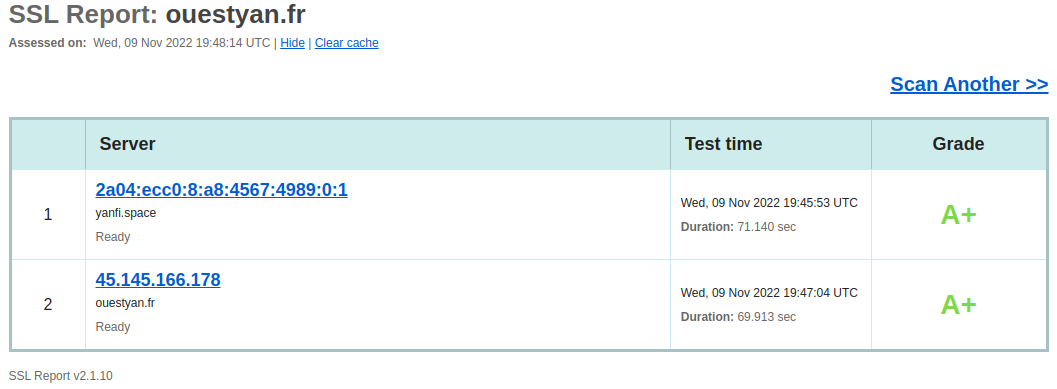
https://www.ssllabs.com/ssltest/analyze/?d=ouestyan.fr
Les entêtes https://securityheaders.com/
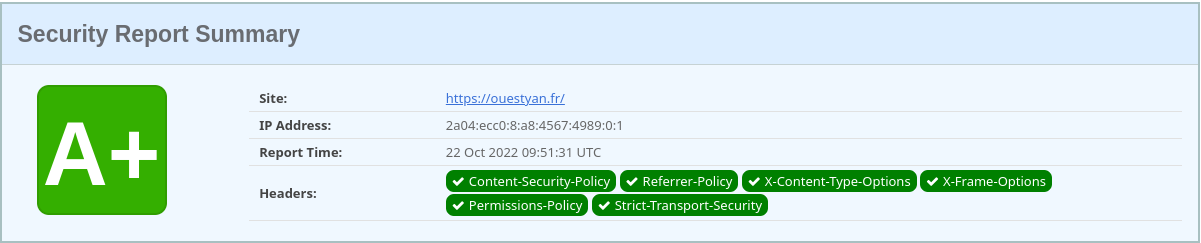
ouestyan.fr
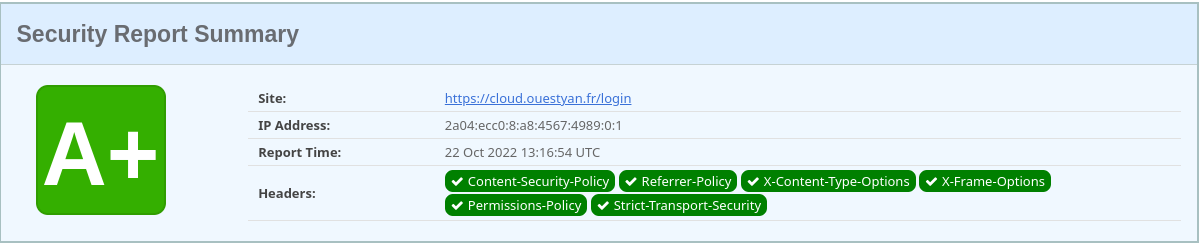 cloud.ouestyan.fr